
Respect my work! or BTC: 1MTFbBSKrocPK7G6GKfG8RoTw5N57WnnNa  If you have paid donate send me e-mail with Your data or transaction number to receive an access code to articles with limited access. |
PmWiki /
Form registerShortcut tableGeneral concept of creating formsMost of the reports require entering parameters like: client number, date etc. So it's justified before report generation to show form, in which you can enter mentioned parameters. Therefore ProReports system is equipped in mechanism of defining forms. Whole concept is based on desktops which idea is shown on below image:  As you can see, desktop is area of a form where you can put other desktops (e.g. on the left side of the image - row are put in column) or other form elements (fields). Thanks to this approach you can design desired form view. Layer can look like this:
As mentioned, layer can be nested, meaning that for each new layer you can select "parent" layer (parent layer). Thanks to that you can gain absolute freedom in arranging form elements. Often when designing from (mainly when doing it first time) it may be very helpful to draw it on a sheet of paper. It helps defining each desktop and form field. Form registeringTo register new form you can use following option Resources->Add form or using buttons: Add form in option Resources->List of form. After selecting one of the options below form will be shown: 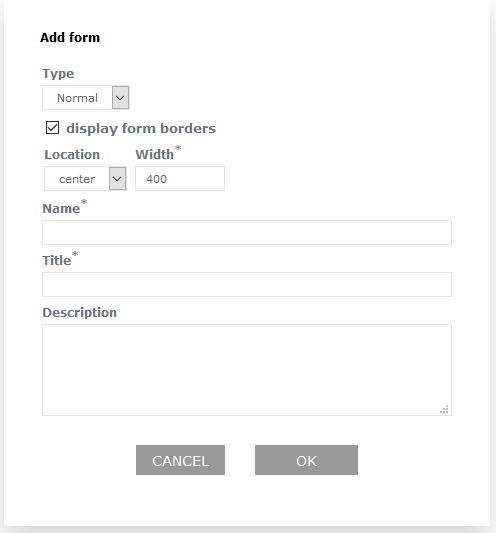 where you need to enter:
Layer registrationTo register a layer use the following option: Resources->List of forms. After selecting correct form you need choose from menu option Layers: 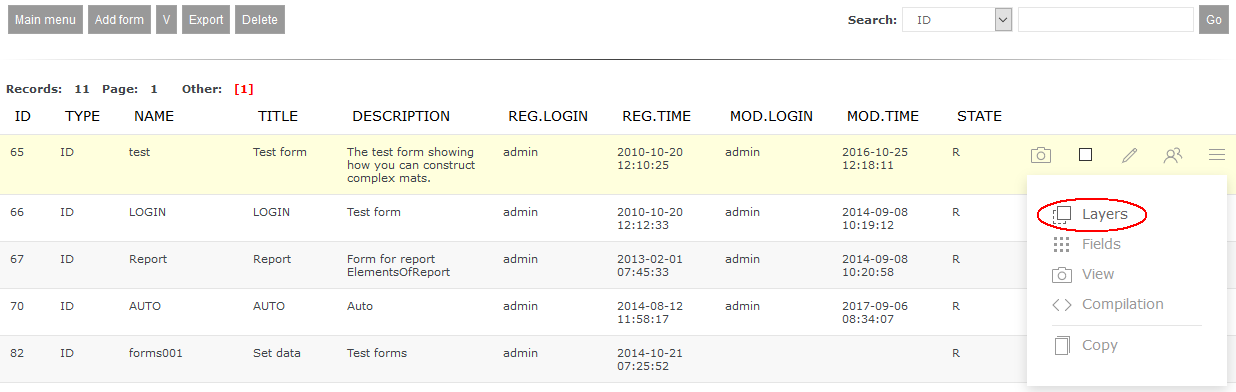 Then you can enter layers list that have been defined for each form:  Pressing button Add layer lets you register new desktop for previously selected form. Registering layer of type ColumnWhen registering layer of type Column the most important is to set:
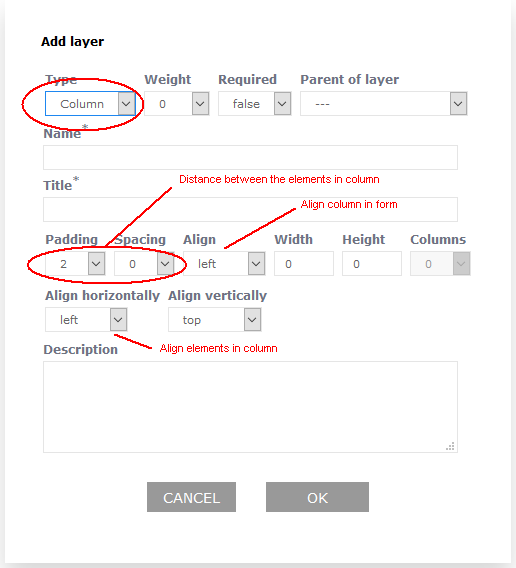 Other fields are used to specify format of registered column (check description on a image above). Field Justify sets alignment of a column inside a form. Field Justify elements vertically aligns elements inside a column, e.g. to the left side.  or to the right side: 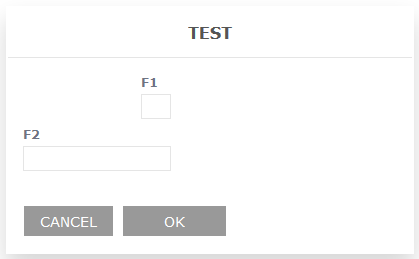 Field Weight influences desktop display order in a form. First desktop with lower weight will be shown. An example below: 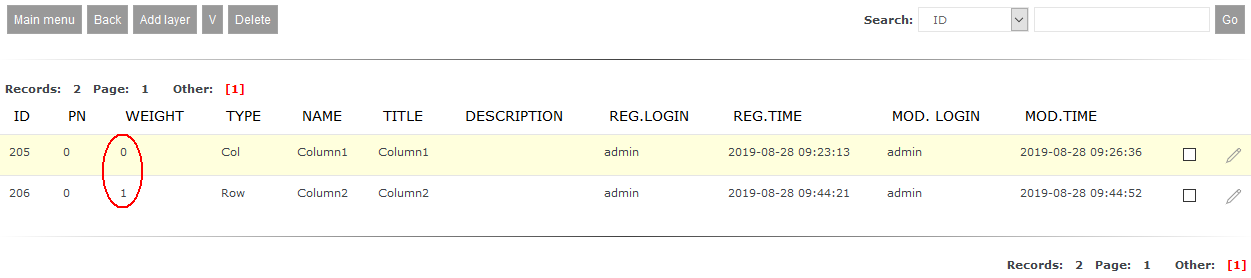 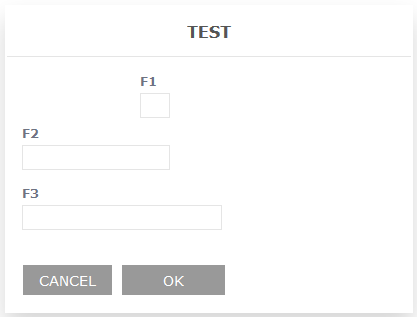 After weight change: 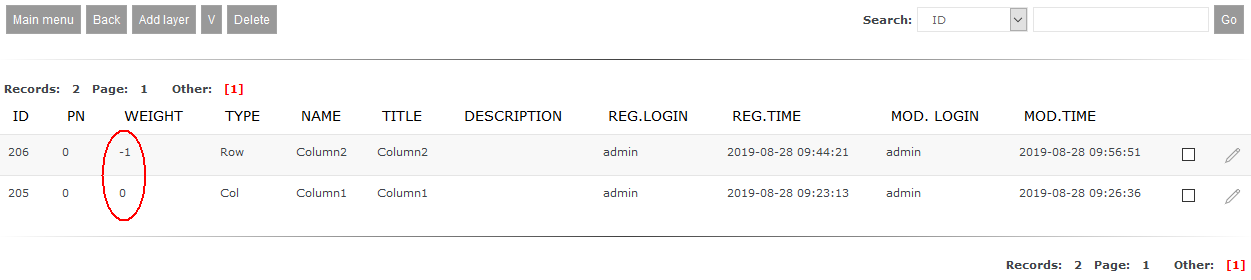 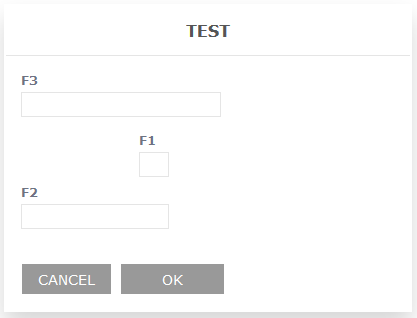 Registering layer of type RowLayer of type Row is the most common used type of a layer. Most often form elements are arranged in rows, which after that are put on main layer. When registering layer of type Row is essential to enter:
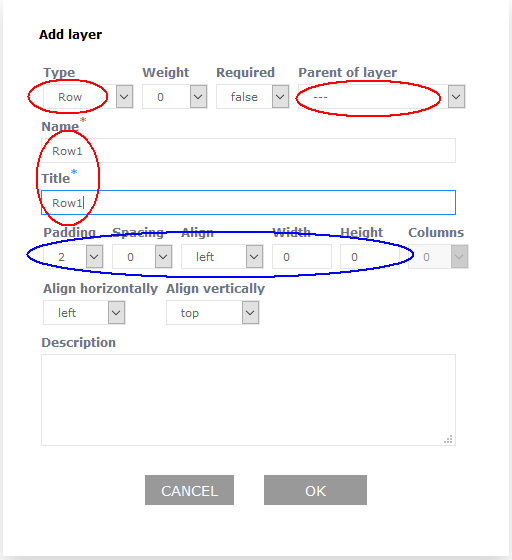 Field Weight influences order of displaying rows in a form. First will be shown layer with weight lower than registered one, then of higher weight (according to ascending weight). Elements marked with blue circle on above form influence the way of arranging elements in registered form (e.g. distance between elements, etc.). You can leave default values here. Registering layer of type GroupIf you want to group few layerss od form fields you can use layer of type Group to do so. Registering this layer in processed the same way as row registration does (click here, to check how to register row). This layer is different in terms of presented header (based on Title field) and all child elements of a group (layers and parent fields) are surrounded with a frame. 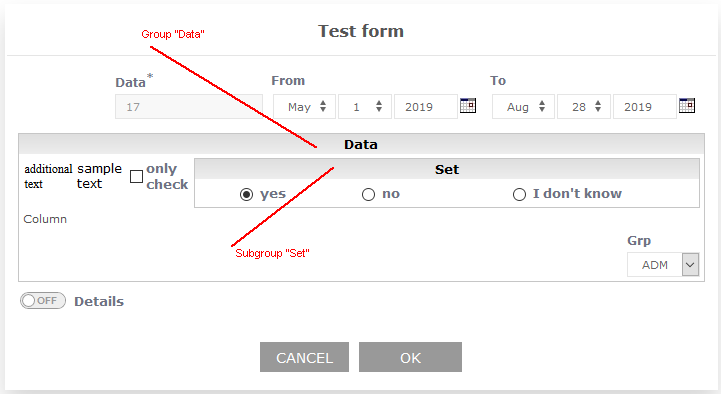 As you can see on image above, groups can be nested (as other types of desktop can). Registering layer of typeGridGrid is a type of layer that allows putting child elements into multiple columns.
Where number of columns is set - when registering layer - with a field Column. 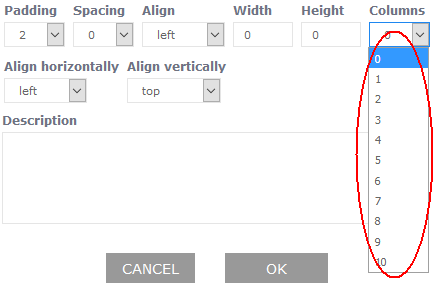 Beside field Column when registering a desktop of type Grid the most important is to set:
Grid works perfectly as a child layer for layer of type Group. Registering a form fieldTo register a form field you can use following option: Resources->List of forms. After selecting right form you need to pick from menu option Fields: 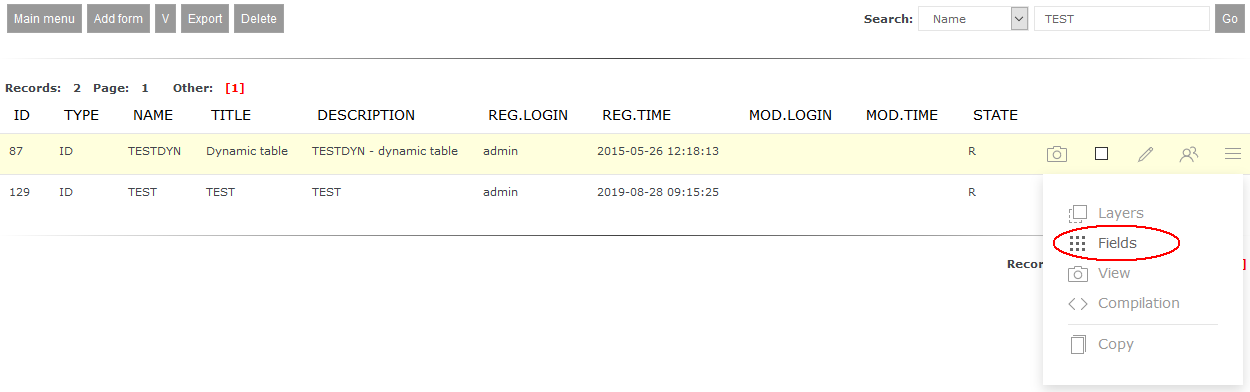 After that we will be show list of fields defined for each form: 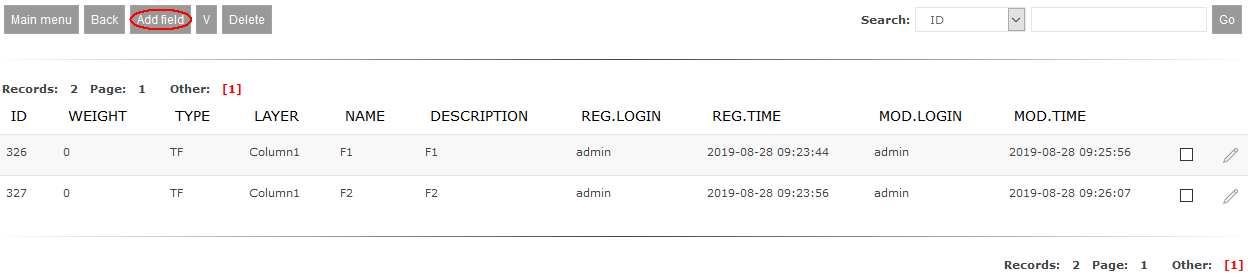 Pressing button New fields leads to opening new window to register a form field. Registering field TextOnlyIf you want to put on a form some kind on information text you can use field TextOnly. 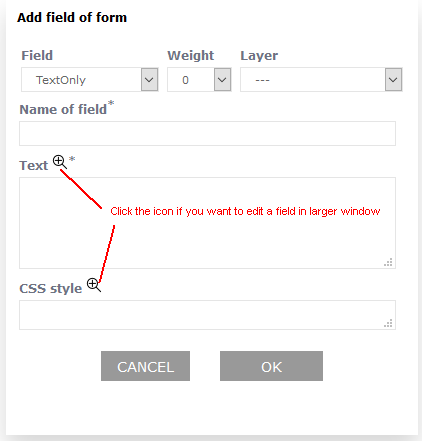 On the form will be set text entered in Text field, which you can additionally personalize with CSS properties in field CSS Style. If you want to enter long text then you can use following icon: 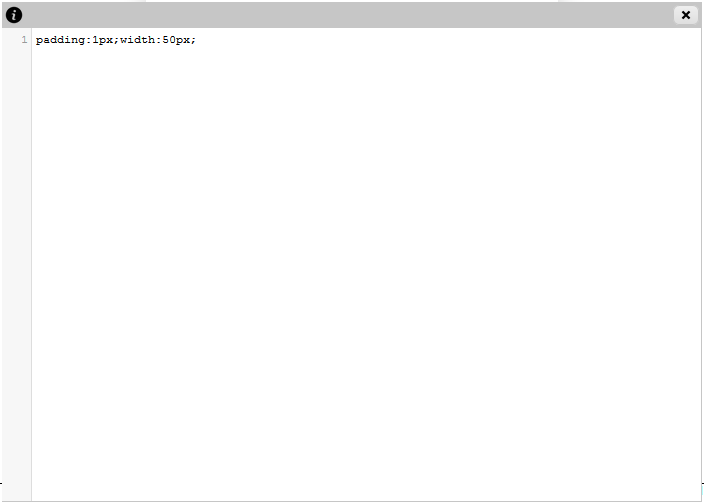 Closing window will send entered text to appropriate field. Effect of field registration of type TextOnly can be seen on a form below 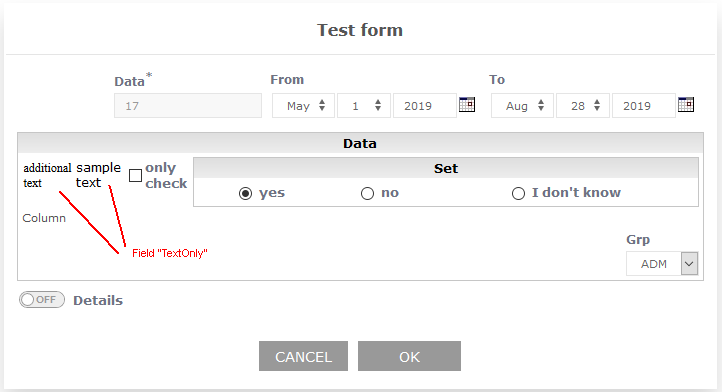 Field Weight has the same meaning as for desktops (here you can read more on desktops), meaning that it sets order of fields that belong to one desktop. Important!
If selected desktop is parent to other desktops, but also contains fields assigned to it, then first will be shown desktops according to weights and after that - field (in the same order rule). Registering field DateFieldField of type DateField is used for entering data in format YYYY-MM-DD. 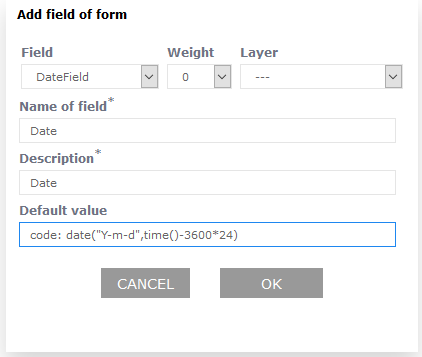 When registering it you can leave field Default value empty (in that case in a form as a default setting will be show current date) or:
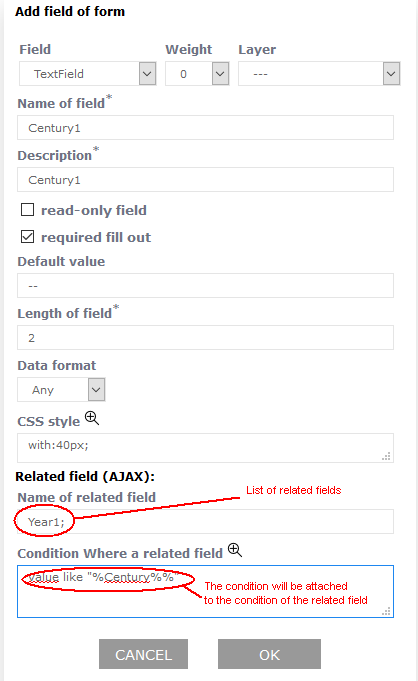
Registered this way field will be displayed in a form as below: 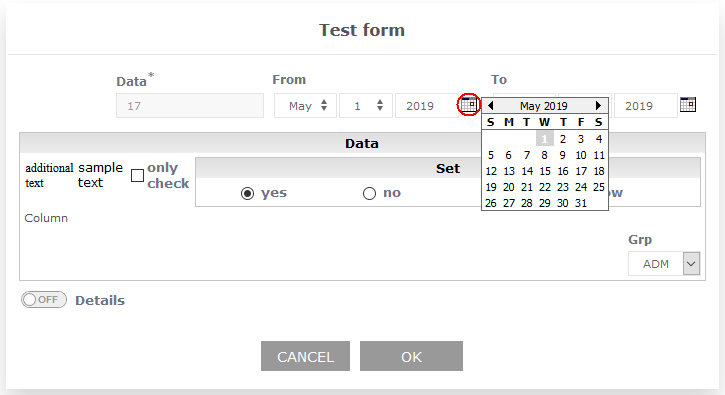 Clicking on marked on an image calendar icon may ease with selecting different date. When changing it you can also use traditional lists. Registering field TextFieldField of type TextField can be used to enter any value. When registering a field you should enter:
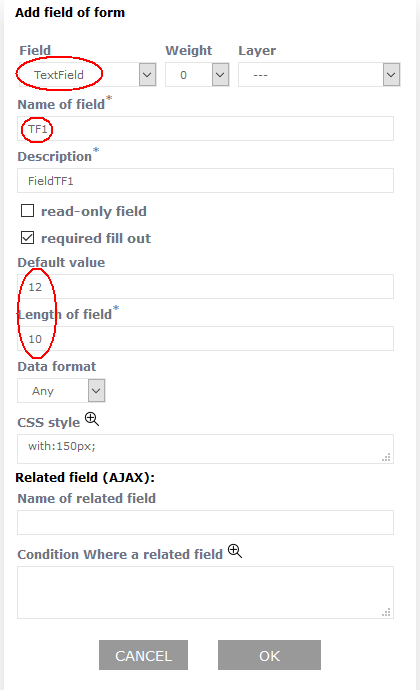 Field Weight has the same meaning as in desktops (here you can read more about desktops) - it sets order of fields on one desktop. Field can be additionally personalized using CSS properties in field CSS Style. Last two fields (Name of child field (linked) and Where clause for child field) can be used to define linking between registed field and other field in a form (value entered in first field influences displaying value in second field). Example of such a linkage can be found here. Field registered in example (image above) in a form looks like below: 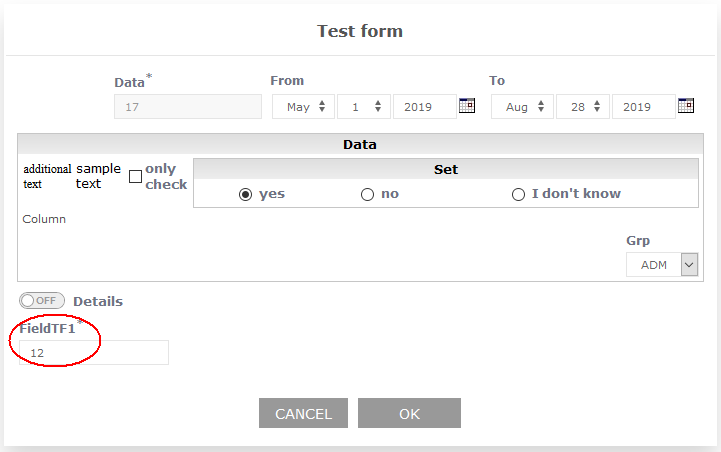 Registering field TextFieldAC (autocomplete)''Another type of field you can define in a form is TextFieldAC (autocomplete). This kind of field if different from regular TextField this way that after entering few letters/numbers full value is autocompleted from defined during registration source field (similar to Google search box). Important!
In a single form you can register maximum of 5 fields of type TextFieldAC. During registration of this field besides values you have to set as for regular field TextField you have to enter:
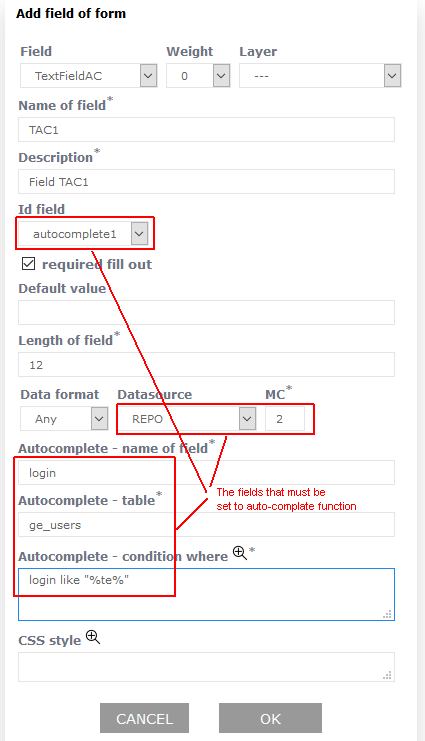 Effect of registration field of this kind and it's usage presents below image: 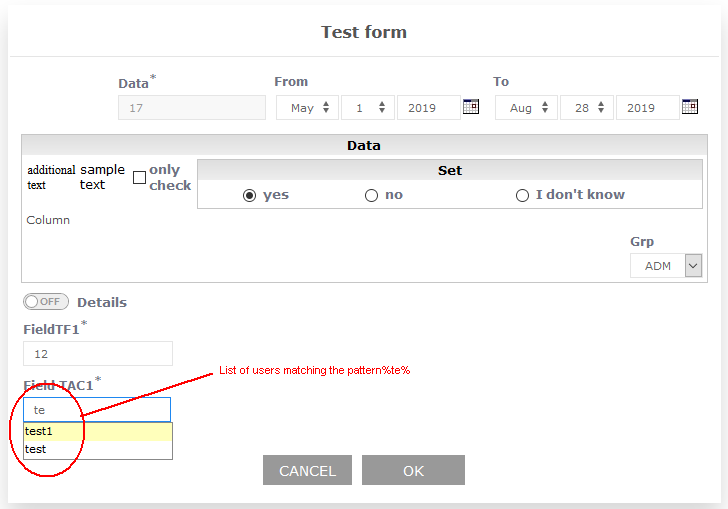 Field TextFieldAC should be used when you choose from great number of elements, e.g. zip code selection. If number of elements is low it's advised using list of choice (field of type ListField). Registering field RadioButtonIn field palette you can also find field of type RadioButton that can be used when you want to pass at least two values to the report (in this field it's possible to define maximum number of 5 elements):  If form are visible values entered in fields Value of n and to report is pased number of selected field. 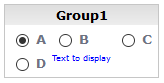 In presented above example after choosing B value, to report is going to be passed value 2. To present field in a form is advised using desktop of type Grid embedded in Group desktop (check image above). Registering field CheckBoxWhen registering field of type CheckBox beside field name and description you should enter:
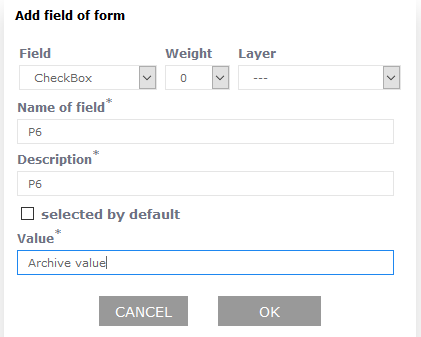 If you want to set checkbox as selected ( 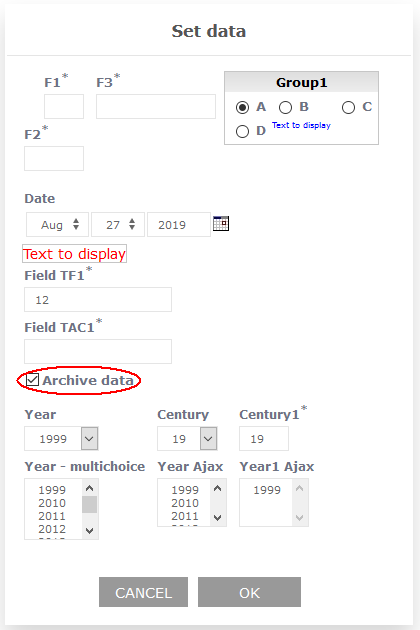 The same as in case of other field position of a checkbox is decided by fields Weight i Layer. Registering field ListFieldWhen registering field of a type LiestField you need to enter:
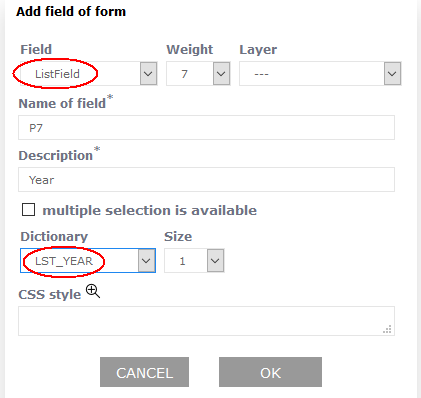 Selecting field named Multiple choice available you enable choosing multiple values from a list at a time (field Size need to be set with a value greater than 1, e.g. 5) Important!
When selecting fields from a list you need to keep Ctrl key pressed to select multiple fields at a time 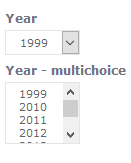 Linked fields (AJAX)In ProReports you can create such a form where between some fields there's going to be dependency (connection). This dependency is visible in a way where entering or choosing certain value in one field (parent field) will have influence on value displayed in other field (child field - linked field - is always linked with a list). Important!
One parent field can be connected to multiple linked fields. Linking choice listsHere is instruction for creating connection (linking) between two fields:
Let's assume that mentioned dictionaries have been created. You want to achieve effect, where selection from first list will narrow down second list only to year in selected century. Registering parent (master) field ListFieldAFirstly you need to register parent field of type ListFieldA. From ListField it is different in a way that when registering it you need to select values of two fields:
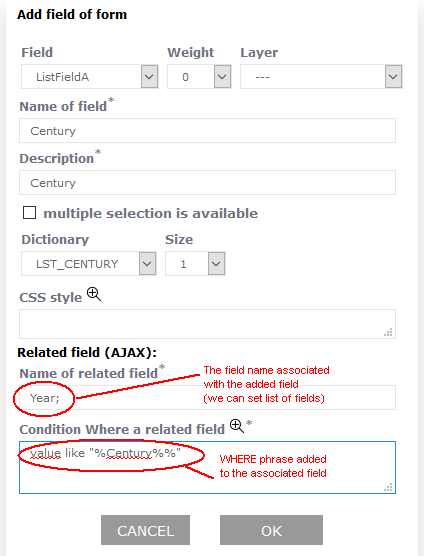 In field WHERE condition for linked field you can use registered field's name in format Registering linked (child) field ListFieldZDIn second step you need to register linked field of type ListFieldZD where you have to set:
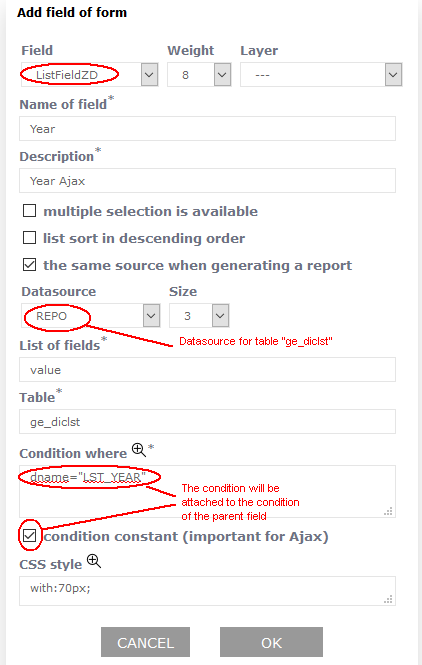 8 8Working presentation in a formIn effect of registering linked (child) fields we obtain following situation. Selecting from list Age number 19 will display on a list Year - Ajax from selected century (of course filled in dictionary LST_ROK - example has only year 1999): 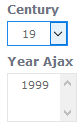 Changing selection to 20 updates linked list (which is limited to values that are in dictionary): 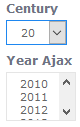 Linking data entry field with selection listIn ProReports there is a possibility to link in entering data form TextField with selection list ListFieldZD. In that case entered value in field TextField has influence on ListFieldZD list content. Registering parent field TextFieldRegistering parent field goes as registration of regular field of type TextField, the only difference is you need to fill two additional fields:
 In field WHERE condition for linked field you have to use registered field name in format Registering linked (child) field ListFieldZDRegistering linked (child) field in this case is identical as in example above (Registering linked (child) field ListFieldZD). Working presentation in a formThanks to linking fields, when entering value 19 in field Age (after entering you need to remove focus from that field - by clicking anywhere else) it updates selection list Year - Ajax: 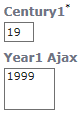 Changing value of field Age on 20 will lead to automatic refreshing selection list Year - Ajax: 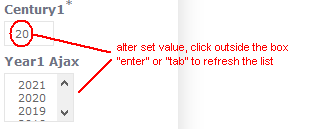 Registering field ButtonFrom version ProReports v.3.1.29g-r10 you can register field Button. When registering this field you need to enter the following data:
How can you use the new fields shown in the test form TestButton and TestButton1. 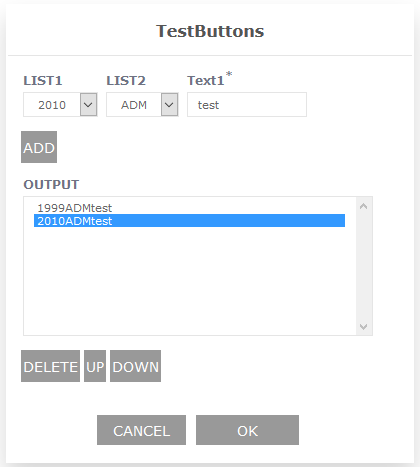 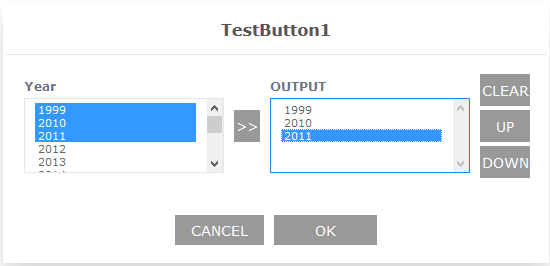 This page may have a more recent version on pmwiki.org: PmWiki:FormsRej, and a talk page: PmWiki:FormsRej-Talk. |
 to edit in bigger window (check image above). Clicking this icon will show bigger window where you can input long text in more convenient manner.
 ) you should choose option